
My Chain of Command gang have been trying to get through the first scenario in the Operation Martlet “Pint Sized” campaign for quite some time. After a long hiatus, Chip, Mark, and Noah were good enough to come around for one final try with getting past that scenario. Failure would mean switching to the Scottish Corridor campaign.
Earlier British attempts at breaking through (here and here) had ended in varying degrees of failure, which might explain the hiatus to some extent. I thought a complete reset might do the trick. Firstly I wondered if the jump off points could be better placed. I’d also found the reconnaissance photo that the Lardies had used, on the NCAP website, and a clearer (well I’m sure the NCAP photo would be fine if I paid for the higher res version) 1947 aerial photo of the same area. They led me to decide that the road the British were advancing down was lined with hedges rather than scattered trees.

Despite my musings, the jump off points ended up pretty much exactly where they had been in the previous games.
The British got off to a fairly good start, they had a Sherman and No 1 section near the road, and No 2 section in the west farm pretty quickly. The Germans deployed a section into the farm in the centre of their line. They had chosen to make the stable there the building that had been strengthened to bunker status.

The view of the centre farm from the commander’s periscope of a Sherman
The Germans brought their Mk IV up and began machine gunning No 1 Section, who were caught on the road. The Germans also deployed a section into the east farm to hem them in.
The Platoon Sergeant directs the 2″ mortar team
That was kind of the British plan, while that was unfolding they brought another section on near the west farm, and began ranging their battalion mortars in for a smoke barrage on the centre farm. The platoon sergeant, also at the west farm, caught the Sherman commanders eye and the tank moved closer for an ‘O’ group.
No 1 Section retreated through the hedge, into the field of fire of the panzer grenadier gruppe in the east farm, but they threw a smoke grenade which kept them somewhat safe. Unfortunately the Mk IV was able to move to get line of sight onto the rear corner of the Sherman and knocked it out with one shot.

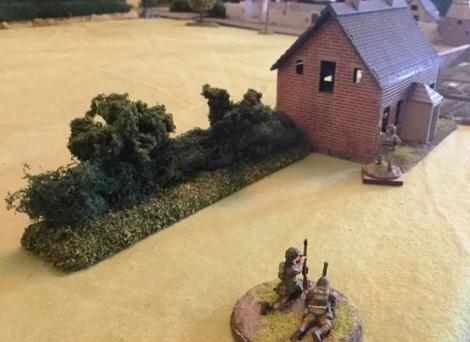
Just before things went pear shaped: the Platoon Sergeant is having a word with the TC about enemy activity in the farm. The photo is looking south, by the way.
Since the smoke barrage had now landed, the British were pretty free to move, so they continued to push forward with No 3 section over the wall on the east edge of the battlefield. The Germans were onto that, though, and out of the smoke their 3 gruppe deployed in a trench to block their path.
The British decided that that was check mate, and retired for another attempt. They had only left two dead on the battlefield, with a couple at the RAP, and a couple missing, so it wasn’t a total drubbing, but there weren’t many options.
That was it, we were giving up, but then Mark announced that having watched all the failures, he had come up with a stratagem. There were a couple of hours left before people had to head off, so we rallied ourselves for another attempt.
This time we swapped the teams around a bit. Mark and Noah played the British while Chip and I played the Germans.
It turns out that Mark’s stratagem was to have the British sprint down the table. We had tried that one once, but the Germans managed to deploy quickly and mowed them down. This game was much more of an edge of the seat affair.
For once the British artillery barrage worked to keep the Germans in their shelters. Mark deployed a section and it was in the centre farm, with a Sherman and a Sherman VC on overwatch, and another section almost in the farm, by the time the Germans managed to deploy anything. The Germans by now only had one jump off point they could use, behind the east farm. A German gruppe appeared there and began shooting up the British section outside the farm.

The British foot race to the centre farm. Most of the shock markers you see are down to disorganisation from moving at the double.

The German gruppe deployed in a perfect enfilade position. It’s a pity for them that they couldn’t shoot for toffee.
A third British section (actually No 1 Section, somewhat depleted from the earlier attack that morning) began the dash down the eastern edge of the table, racing the German Mk IV which was making its way through the orchard. It looked like their number was up when the panzer crashed through the hedge in front of them, but the panzer’s MG fire was ineffectual and the British squad was able to exit the Germans’ base edge.

All the British have to do is get that section off the table before the Mk IV shoots them.
Since the British had penetrated the German outpost line, the Germans retired, leaving just one man dead and another at the RAP. The British advance had been held up for eight hours, so that was a successful delaying action. The British had also taken the option of waiting until midday to avoid losing troops in the morning mist. So in the next game, the British will continue into Fontenay-le-Pesnel itself, on the evening of the 25th. They will have their work cut out clearing the Rauray Spur before Operation Epsom kicks off.
